A love affair with leafy greens (ii)

In which there is actually a recipe.

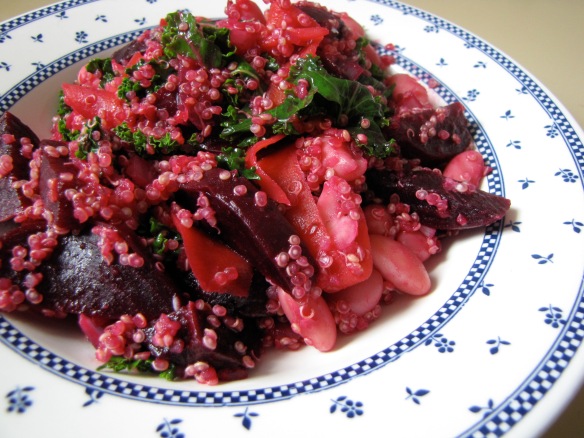
Warm greens* salad

*you can use kale, (swiss) chard, collard greens, beet greens, and/or spinach

Ingredients:

+ quinoa or rice or pearl barley or whole grain pasta or a baked or roasted potato or skip this ingredient altogether

+ cooking oil

+ garlic (a clove or two, pressed/crushed/minced)

+ onion (chopped/sliced/whatever– preferably red, but shallots or any cooking onion will do)

+ veggies: any appealing-to-you greens, or combination thereof [kale, beet greens, chard, collard greens, spinach], carrots, parsnips, beets, mushrooms, cauliflower, broccoli. I shred the greens by hand, shave the carrots and/or parsnips with a peeler for quick cooking, and I usually boil/roast the beets all at once when I first get them so I can add them at the end just to heat them up.

+ optionally: (if you feel fancy) goats cheese (without cheese, this is a vegan dish, by most definitions) &/or frozen or fresh raspberries or blueberries (a handful or two, squished), balsamic vinegar, and olive/sunflower/grapeseed oil for a vinaigrette (1 part vinaigrette to 3 parts oil)

Make:

1. rinse and scrub the quinoa in a fine sieve, put it in a pot with water (2 parts water to 1 part quinoa; add a stock cube if you desire) on high heat, bring it to a boil, reduce the heat and let simmer for about 15 minutes/until there’s no excess water. I find 1/4 to 1/3 cup of quinoa is a good single portion. (the veggies also works well with a baked potato, or on their own)

2. while you’re letting the quinoa go, heat up cooking oil in a pan on medium heat, and throw in the garlic, cook for 30 seconds to a min.

3. add the onion and cook for a few minutes

4. add other veggies before the onion gets translucent: carrots, parsnips, pre-cooked beets, whatever (I sometimes add a little water and cover the pan to cook the veggies faster)

5. cook your greens! you can (1) add your greens to the pan with a little water and cover up the pan to steam them for a minute or two, or (2) add your greens to the quinoa while there is still a bit of water in the pot, or (3) stem the greens in a colander over the pot with the cooking quinoa, or (4) pour a little boiling water over the greens in a strainer/colander to cook them instantly

6. mix all the veggies together with the quinoa and serve warm (with goats cheese and/or berry vinaigrette on top)

alternatively, you can roast any good roasting veggies (several whole garlic cloves, onion, carrot, parsnip, beets, cauliflower) tossed with oil, salt and pepper in a baking dish in the oven at 250˚ or so, adding mushrooms and greens towards the end, and mixing the quinoa in at the end. However, this might take a little longer (45 min to an hour)

a lot of beets in this version

a lot of beets in this version – eat them! they’re good for you.

peanut stew

Giving the peanut stew recipe from the Vegan Stoner a whirl:

1. chop half an onion & cook in pot

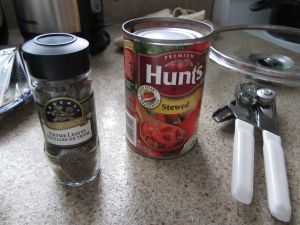
2. add a can of stewed tomatoes, a half cup of crunchy peanut butter, & a half can of garbanzo beans [chickpeas]

3. chop a potato & add to pot* with a sprinkling of thyme

4. cover pot and cook on low heat for 20 minutes

5. serve on rice

6. munch

* may want to parboil the potato first, or ensure you cut very small pieces so they cook through

I’ve never bought or cooked with stewed tomatoes before and at first I wasn’t so sure about the peanut butter. I like peanut butter, but I am not much in the habit of cooking with it; my mum is very allergic to nuts, so I never ate them growing up. You can’t miss what you’ve never had, but, oh! I tell you: when I moved out and discovered I could buy and eat all the Nutella I wanted … that was a wonderful and a dangerous day.

I digress.

why this recipe is cool

Like many Vegan Stoner recipes, it calls for a bunch of non-perishable and inexpensive food items. (Dried thyme is an exception to “inexpensive”, and I’m using posh all-natural peanut butter because I got it on the cheap at an army surplus store in Kamloops. I’m not even kidding.)

Food waste is something I’m pretty concerned about, so I try to be mindful of how much fresh stuff I buy, but cooking for one presents some challenges: fresh stuff often comes in rather massive bundles. It’s always a song and dance trying to make sure things get used up before they rot or trying to work out clever things to do with food items that are fast approaching the end of their fridge-lives.

Trying to buy less but shop more often is something I’m working on, but sometimes time is tight because I planned poorly and I just can’t swing a shopping trip. In such cases, how marvelous to be able to put together a whole meal from things in the cupboard.*

making stew!

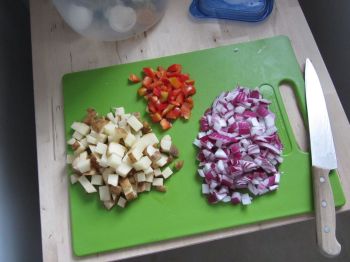
I prepared all the ingredients and added some extras, seeing the excellent opportunity provided by a stew to deal with some fridgy** items. Some beet greens, some red pepper, an already-opened can of chickpeas. I also added a spoonful of tomato paste because I like tomato-y things.

Easy peasy: set the rice on in one pot, throw the ingredients in the other pot.

the result

A delicious, nutritious, hearty dinner. I’d not hesitate to make this again for myself, or for nut-eating friends 🙂

–x–

*Now that I’ve written this, I see the irony of and the privilege in my enthusiasm over tinned food. I’ve little to complain about in life if I’ve always enjoyed meals made from fresh ingredients, and making things from cans is a novel experience…

**My mother uses this word to describe the way things smell when they’ve been in the fridge too long. Highly accurate, worth bringing into the general lexicon.

If life gives you lemons, make lemon curd with berries

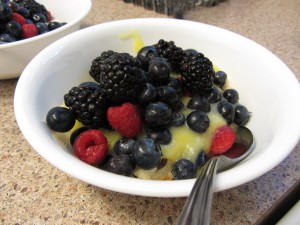
A couple weekends ago my lovely friend Emily came to visit. She endured a long and arduous bus ride and yet still arrived bearing key ingredients for a delicious summer dessert.

–x–

Armed with

+ 6 eggs, separated (this recipe calls for 6 yolks and 2 egg whites; we saved the remaining whites in a little container for future low-cholesterol baking endeavours, or Sunday morning pancakes)

+ 3 lemons (zested and squeezed for ½ cup of juice)

+ ¾ cup sugar

+ ½ cup butter

+ A few cups of mixed berries (blueberries, blackberries, raspberries)

+ Something on which to pour the curd and berries (tarts, pieces of sweet bread, or scones, or croissants. Emily had brought yummy homemade raisin scones, which worked wonderfully.)

and Emily’s mum’s lemon curd recipe, we made one of the best Saturday evening meals in recent memory.

Yes, we made lemon curd and berries for dinner. We were going to have healthy dinner food, too, but when it came down to it we realised we weren’t that hungry, and as we say in my family: life is short, eat desert first.

This is what we did:

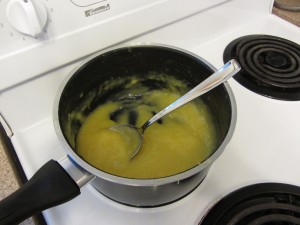
Melt the butter in a pot on low-to-medium heat. Whisk in the egg yolks, lemon juice, lemon zest, and the lemony pulp lemon-juicing by-product. Whisk and whisk and whisk on medium heat for 10 minutes until the mixture thickens. Remove from heat and let cool. Place tart/scone/dessert foundation of choice in a bowl and ladle on curd and berries. Eat!

our thickened lemon curd

–x–

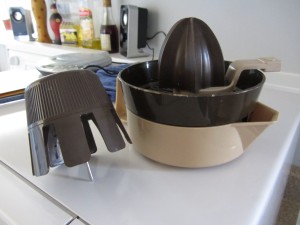
This was quite simple to make, and a good team-effort sort of recipe what with the repetitive actions of zesting and squeezing lemons (for which I was thrilled to be able to use the 25-year-old juicer gifted to me by my parents), and whisking.

A super delicious, lemony, summer dessert!

hand-me-down retro hand-juicer

dinner

Ta-BOO-lee

How’s this for point/counterpoint: Amy is making wonderful-looking no-knead bread while I am thinking about:

Things ‘gluten-free’

(Disclaimer: my information comes from talking to people with opinions, reading food labels, and doing some random internet searching. Therefore, please read with grain of salt in hand.)

Lately there is a lot of fuss about gluten-free food and gluten-free diets. As with any (food) trend, there are a couple of vocal camps; in this case, the ‘gluten is bad for you! live a healthier life by going gluten-free!’ camp, and the ‘those crazy people on their gluten-free diets have no idea what they’re talking about and the whole thing is a load of BS’ camp.

Then there’s this other camp of folks who are forgotten in all the buzz: those who actually really can’t eat gluten or else bad things happen to their bodies, i.e. folks with Celiac disease. The bodies of people with Celiac disease cannot process gluten. It jams up intestines and prevents absorption of other nutrients, which is very, very not good, and which can (and does) make folks feel very, very, very ill. For a person with Celiac, not eating gluten is a good way to fix this and restore digestive health.

Ok, wait: what is gluten? Basically gluten is a thing found in wheat and barley and rye. It is in flour, in bread, in pasta, in beer, and shows up in a lot of processed foods as a filler and additive. Gluten is NOT in things like rice, (wheat-free) oats, potato flour, quinoa, and polenta (cornmeal). Things gluten free (e.g. bread, tortilla wraps, &c.) are becoming easier and easier to find in mainstream Canadian grocery stores. The Canadian Celiac Association outlines a gluten free diet.

I don’t know enough about the reasons for and against opt-in gluten-free diets (as opposed to necessary-to-digestive-health gluten-free diets), so will not weigh in on that particular food trend debate. What I do know is that some people think that eczema can be worsened by gluten. Because I sometimes have to deal with eczema, I experimented for several months with cutting gluten. I learned that, for me, stress is a greater irritant than gluten, so cutting gluten didn’t directly help in my case. However, I liked a lot of the food I was making, and, unsurprisingly, eating a lot of bread and pasta, and drinking a lot of beer make me feel not very nice, so I continue to pursue alternatives, like…

Gluten-free Tabbouleh!

(I checked with my friend Emily: at least by white people in Canada, tabbouleh is pronounced ‘ta-BOO-lee’.)

This recipe is adapted from Julie Van Rosendaal (see this post) and the recipe on the back of my bag of chia seeds.

½ cup quinoa (brought to a boil in 1 cup of water, then reduced to simmer for 15 minutes; it’s cooked when the little white coils around the quinoa start to come off)

½ can chickpeas (optional, though a delicious addition)

¼ cup chia seeds (optional)

2 tomatoes, chopped finely

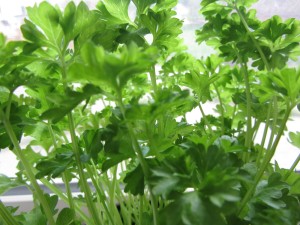
2 cups chopped fresh parsley

a few green onions (or a small red onion, chopped finely)

⅓ cup olive oil

¼ cup fresh lemon juice

Cook the quinoa. Chop things. Mix the lemon juice and olive oil in a little bowl. (In the last minute or two of cook time for the quinoa, I like to throw in the chickpeas to soften them a bit.) When the quinoa is done, stir everything together in a bowl and pop it in the fridge for a bit so all the flavours blend. Eat!

–x–

This was so delicious! So quick to make, meets tricky dietary requirements (it is gluten-free AND vegan), and is such a lovely, light, hot weather food. I divided it up into Ziploc containers took them to work for lunch (leaving these in the fridge for another day or two had the added bonus of making it even more flavourful).

Kate’s parsley plant: parsley is one of the main ingredients in tabbouleh

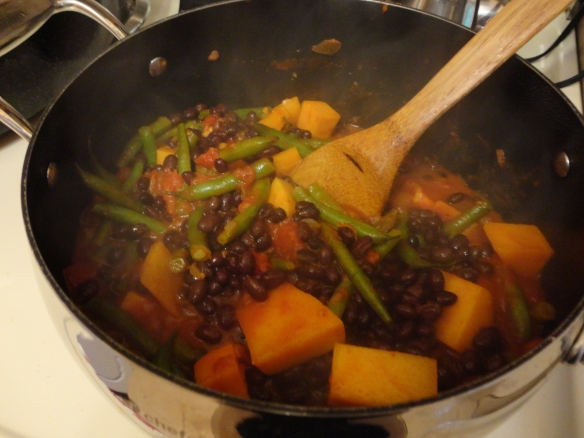
Squash and Bean Stew!

Like many recent university graduates, I live at home with my parents. Please don’t ask how “recent.” I use the word loosely.

I mention this because I prepare most of my meals with my mom. In February my mom suggested we start eating vegetarian. This was something I did at school (for economic and environmental reasons), but we definitely needed a few new recipes. Let’s face it, fried tofu and a sleeve of soda crackers is not an appropriate dinner for nonstudent adults. We have slowly been increasing our menu repertoire which now includes a few favourites. When we find something we really like, however, we get into a groove (I prefer this word to “rut”). Right now we are in a squash stew groove!

This recipe is really simple and makes enough that two people can have it for dinner and enjoy leftovers for lunch…for several days. What I particularly enjoy is that the vegetables stay slightly crisp and distinct from each other even after reheating.

Tools you need:

–          Cutting board

–          Knife

–          Big pot (I love that you only use one pot!)

Ingredients:

–          1 tablespoon olive oil

–          1 large onion, chopped

–          2 garlic cloves, minced

–          1 tablespoon chili powder

–          1 1/2 teaspoons ground cumin

–          1 28-ounce can diced tomatoes in juice

–          2 pounds butternut squash cut into 1-inch pieces

–          4 ounces green beans, trimmed, cut into 1-inch pieces

–          1 15- to 16-ounce can black beans, rinsed, drained

–          1 tablespoon minced, seeded jalapeño pepper

–          1/2 cup chopped fresh cilantro

Unless I am baking, I generally use recipe measurements as guidelines and ingredients as suggestions. So if you want to substitute different veggies depending on availability, go for it! If you don’t like heat, omit the jalapeño. Hate cilantro? Try parsley instead. But I find a fresh herb is needed to brighten it up a bit. Add whatever herb just before serving.

Directions:

  1. Heat oil in heavy large pot over medium heat. Add onion and sauté until tender and golden.
  2.  Add garlic, chili powder and cumin and stir until garlic is soft. This will take about a minute.
  3. Add tomatoes with juices; bring to boil.
  4.  Stir in squash and green beans. Reduce heat; cover and simmer until vegetables are almost tender. You can prick them with a fork to check. If you like really crisp green beans, add them a few minutes after the squash.
  5. Stir in black beans and jalapeño. Cover and simmer for a few more minutes (5 or so).
  6. Stir in cilantro.
  7. Eat it! (Remember to share).

Recipe originally from epicurious.

No-Need-to-Knead Bread

“Good bread is the most fundamentally satisfying of all foods; and good bread with fresh butter, the greatest of feasts.” – James Beard.

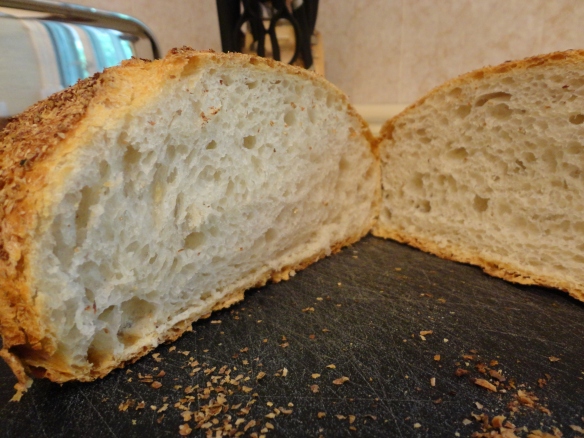
So I finally baked the no-knead bread!

It turned out well…the second time. The first time that I made the dough I added too much water. The dough was really wet and glue-like rather than slightly sticky to touch and shaggy looking. It is really humid where I live, especially this time of year. So my flour may contain quite a bit of moisture already. Trying it a second time, I found that I did not need the full 1 and 5/8th cups of water. I think I likely used somewhere between 1 and ½ cups to 1 and 2/3 cups. Once I figured this out, manipulating the dough was super easy.

Another challenge I had was finding the right time to make the dough so that it would have long enough to rise and be ready at a time that was convenient for me to bake ( not the middle of the night or while I am at work). I wanted to follow the recipe as closely as possible – at least the first time – to test my success. I followed the directions for a 12 – 18 hour rise and a 2 hour proof strictly. I decided before hand that a weekend would be best for this. I made the dough shortly after getting home from work on Friday night. This is how everything went down:

Time Bread Schedule My Schedule
6 pm – 6:05 pm Friday Dough creation. Ditto
6 pm Friday to 9 am Saturday (16 hours) Bed time: Rested in a bowl on top of the microwave covered with cling film. Had dinner, painted my nails, watched a movie, and then slept.Other things that can (hypothetically) be done while the dough rises: drive-in movie viewing, essay writing, pub crawling, ball room dancing, hiking through the woods, speed dating, sky diving, debate club…ing, browsing Pinterest for hours, etc.
9 – 9:15 am Massage: Folding. Folded dough over 3 times, and then left it to rest on the counter for 15 minutes.
9:15 – 11:15 am Knap time: Resting and leavening on counter. Shaped dough into a ball, sprinkled it with wheat bran and wrapped it in a tea-towel.Then I went for a nice jog, showered, made tea.
11:30 am – 12:30 pm Sauna: baked in a steamy pot in the oven.At the 30 minute mark I took the lid off of the pot to find that the bread was already golden brown. I left the lid off and turned the oven off to let the residual heat finish the baking. Drank tea, ate breakfast, browsed Pinterest, showered and dressed.
12:30 pm Met untimely demise. Ate lots of bread!

Bottom right: the heavy, green enamel pot I found for $35 at a discount kitchen supply store. It worked very well!

Recipe (from the New York Times)

By Jim Lahey of Sullivan Street Bakery in Manhattan, New York.

–          3 cups all-purpose or bread flour, more for dusting

–          ¼ teaspoon instant yeast

–          1¼ teaspoons salt

–          Cornmeal or wheat bran as needed.

1. In a large bowl combine flour, yeast and salt. Add 1 and 5/8 cups water, and stir until blended. The dough will be shaggy and sticky. Cover with cling film. Let dough rest for 12 to 18 hours at room temperature (22 degrees C).

2. After resting 12 to 18 hours, the dough surface will be dotted with bubbles. Lightly flour a work surface and place dough on it; sprinkle it with a little more flour and fold it over on itself once or twice. Cover loosely with plastic wrap and let rest about 15 minutes.

3. Using just enough flour to keep dough from sticking to work surface or to your fingers, gently and quickly shape dough into a ball. Generously coat a cotton tea towel with flour, wheat bran or cornmeal; put dough seam side down on towel and dust with more flour, bran or cornmeal. Cover with another cotton towel and let rise for about 2 hours. When it is ready, dough will be more than double in size and will not readily spring back when poked with a finger.

4. At least a half-hour before dough is ready, heat oven to 450 degrees F. Put a 6- to 8-quart heavy covered pot (cast iron, enamel, Pyrex or ceramic) in oven as it heats. When dough is ready, carefully remove pot from oven. Slide your hand under towel and turn dough over into pot, seam side up; it may look like a mess, but that is O.K. Shake pan once or twice if dough is unevenly distributed; it will straighten out as it bakes. Cover with lid and bake 30 minutes, then remove lid and bake another 15 to 30 minutes, until loaf is beautifully browned. Cool on a rack.

Yield: One 1½-pound loaf.

Thoughts:

Now that I know that the dough comes together very quickly and that the bread bakes in less than an hour, I might try making the dough before I leave for work (around 7 am) and then proofing after 12 hours. If all goes to plan the bread can go into the oven at 9 pm and be out by 10 pm. I may even see what happens if I make the dough one evening and bake it another. I don’t know if 24 hours (as opposed to 18) is really going to make or break (punny!) this bread.

I would also like to try the bread with whole wheat flour next time and then possibly with rye or whole grains. I have read that the grain in the whole wheat can shred the gluten molecules, making the bread tougher. But there are plenty of recipes and blog posts with advice on how to mitigate this. I anticipate that whole grains would be even trickier. I think the whole wheat will be a great, manageable next step.

Steamy Kitchen has a great photo step-by-step that I found helpful and provides proof that four-year old can make this bread!

Vegan-easy

A lot of people might think that being a vegan, or cooking vegan meals, or baking vegan treats could be really intimidating. Like it might possibly involve a lot of strange and exotic ingredients, and kitchen acrobatics.

What is a vegan? What is a vegan meal?

A vegan is a human who chooses not to consume any animal products or by-products such as meat, cheese, eggs, dairy, butter, gelatin (sometimes in yogurt, licorise allsorts), fast food french fries (can be deep fried in animal fats), honey (made by bees), &c. It might also involve wearing clothes and shoes made only from plant-derived or synthetic materials (no leather or wool). Folks do this for political, ethical, dietary, religious, and/or health reasons. (This list, I recognise, fails to do justice to the myriad reasons which inspire and motivate people to become vegans, but which must suffice for the sake of brevity. If you know things about being a vegan/eating vegan, please share your thoughts! Teach me things!)

There are varying degrees of veganism. For example, some vegans may go so far as to avoid refined sugar, because sometimes animal charcoal is used in the refining process. A cool lady I knew, Steph, was a vegan for dietary and health reasons (for her, the ethical implications were an awesome bonus), and she owned and wore a kickass pair of leather boots. To each her own.

In short, vegan meals are meals that do not include any meat or animal byproducts. Making a vegan meal might sound challenging. ‘But what would you even put in a vegan meal?!’ one might ask.

the answer

The Vegan Stoner is here to prove that you can make delicious, nutritious, über-cheap, easy-peasy vegan meals with 6 readily-available ingredients in 6 steps! It is even illustrated!! Look:

I’m a big fan of these recipes because they are so basic, they don’t require that you have expensive kitchen tools or know fancy cooking techniques, and while some recipes call for an obscure vegan substitute, they are not all heavily soy dependent. (Soapbox aside: I tend to think an over-dependence on soy products is not terribly good for your body, or the earth. Maybe I’ll write about this another day.)

Since I am not vegan myself, I am ok with substituting cow’s milk yogurt for soy yogurt, and I am ok with using honey instead of agave syrup. (Though if you are looking for something a bit easier to come by than agave syrup, which is a cactus-plant-derived sweetener, you can opt for maple syrup, a tree-sap-derived sweetener.)

Have a go! I think you’ll like it: The Vegan Stoner.

Another kind of cake

So, where is the follow-up to the red velvet cake recipe?

To be honest, I got a little ahead of myself with that one. Instead of looking forward to making a red velvet cake, I began to stress out about it: I don’t know enough people in town yet with whom to share a cake, and I was getting a bit worried about (a) most of the cake going to waste for lack of eaters, or, in order to guarantee more eaters, (b) trying to transport a cake on my bicycle to my workplace to share it with my co-workers. (Nothing doing.)

Stressing out about cake doesn’t really seem in keeping with the spirit of this blog, so I intend to leave red velvet cake aside until a proper cake-eating occasion arises.

In the meantime, I was deciding what to have for dinner this evening: I’ve done a lot of the savoury, veggie-&-greens meals this week and Sunday night seems to call for something different, some comfort food, something more indulgent. What better thing is there for such a desire than pancakes?!

I love making pancakes: they are easy, they are versatile, they are substantial enough to eat for any meal, you can make fun shapes out of them (my father introduced me to the wonders of making hearts and first initials out of pancake batter)…
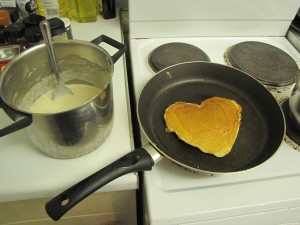
heart-shaped pancakes for valentine’s day

…they are an incredibly social food (many of my friends can attest to at least one occasion where I insisted they come over for a pancake dinner), but also are an easy thing to whip up for one. It is hard to find a more basic kind of cake than a pan-cake.

Julie Van Rosendaal is the genius behind my favourite cookbook: Starting Out.
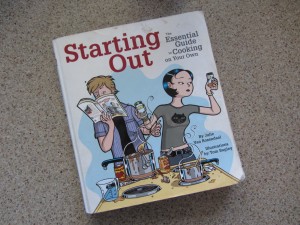
Kate thinks Julie Van Rosendaal’s ‘Starting Out’ is the best cookbook anywhere.

While the title suggests this cookbook is appropriate for folks just starting out cooking on their own (indeed, I bought it seven years ago when I was moving out to attend university and had little experience in the kitchen), I continue to use and love it. This plain paper, simple, glossy-photo-free cookbook features basic recipes, shows you how to alter them, subtract, substitute, or add ingredients to suit your taste, and ultimately helped me to develop confidence and competence in the kitchen.

But I digress.

Forget the pancake mix. Making pancakes from scratch is simple and quick, plus from-scratch pancakes taste so much better than those made from pancake mix! The best part is that you might already have most of the ingredients in your kitchen, or maybe you’ve got the dregs of a carton of buttermilk or some spare eggs that you’re wondering what to do with.

–x–

Pancakes

from Julie Van Rosendaal’s Starting Out

Ingredients

2 cups (500 mL) buttermilk or 2 cups (250 mL) milk plus 1 Tbsp (15 mL) lemon juice or vinegar

2 cups (500 mL) all-purpose flour (or hald whole-wheat, half all-purpose)

2 Tbsp (30 mL) sugar

2 tsp (10 mL) baking powder

1/2 tsp (2.5 mL) baking soda

1/4 tsp (1 mL) salt

1 large egg

2 tbsp (30 mL) melted butter or oil

Any additions you like: fresh or frozen (unthawed) berries, sliced banana, chopped or ground nuts

[I’m a big fan of banana pancakes with chocolate chips.]

Directions

(1) If you are using regular milk, pour it into a small bowl or measuring cup and stir in the lemon juice or vinegar; set the mixture aside for a few minutes.

(2) In a large bowl, stir together the flour, sugar, baking powder, baking soda, and salt. Stir the egg and melted butter or oil into the buttermilk or milk mixture with a fork or a whisk.

(3) Make a well in the dry ingredients and pour in the milk mixture; stir just until the two are combined. Don’t worry about getting all the lumps out– overmixing may result in tough pancakes.

(4) Set a large non-stick skillet over medium heat. When the skillet it hot (test it by flicking some drops of water on it – they should bounce) spray it with non-stick spray or drizzle it with oil and swirl to coat it. Ladle the batter onto the skillet, making the pancakes any size [or shape!] you like. If you want to add berries, slices of banana, or anything else, scatter them directly onto the pancakes as they cook.

(5) Turn the heat down and cook the pancakes for a few minutes, until the bottoms are golden and bubbles begin to appear in the surface. When the surface appears almost dry with lots of bubbles breaking through, use a thin, flat spatula to flip the pancakes over and cook them for another minute, until they’re golden on the other side.

(6) Repeat with the remaining batter. If you need to keep the finished pancakes warm, keem them uncovered on a plate in a 200˚F (110˚C) oven. [Or, a more energy friendly alternative: just stack them on a plate in the microwave. You don’t need to run the microwave: just popping them in and closing the door is enough insulation.] If you don’t want to cook them all at once, the beftover batter can be covered and kept in the fridge for several days.

(7) Serve the pancakes with maple syrup [or Saskatoon berry syrup], or thaw a package of frozen berries in syrup to top them with.

–x–

One batch is enough for three hungry ladies. This recipe splits in half easily (I half everything, but still use one egg). A half-batch is enough for one hungry lady with leftovers for a couple breakfasts/snacks/lunches/dinners.

pancakes with saskatoon berry syrup

Happy eating!

–x–

More Jule Van Rosendaal

Julie talks about Blueberry/Saskatoon Berry Perogies on the CBC Calgary Eyeopener and she writes wonderful articles like this one about delicious, healthy alternative foods for Swerve Magazine on a fairly regular basis. She’s also on Twitter, and she writes about ‘real meals’ on her ‘reality cookbook’ website, Dinner with Julie.

Simple Amish Friendship Bread (Sans Pudding Mix)

On Friday I was given a container of  Amish Friendship Bread starter.

I have to admit, the gesture is nice. You receive a bag/container of starter and ten days later you return a loaf of the bread to the person who gave you the starter. You also have a loaf or two for you and your family/friends/co-workers. In the end, you are left with enough starter to pass on one cup to a friend and enough to continue baking yourself. It should foster an appreciation for sharing food with friends. This is precisely what we are trying to promote on this blog.

While the idea is really lovely, I just have two small problems. I don’t want to tend to the starter unless I know that I love the resulting bread. Why would I want extra starter if I don’t want to use it myself or if I don’t have someone to pass the starter off to? Furthermore, I don’t really find the recipes for Amish Friendship Bread appealing. I think food should be simple. I don’t mind if a recipe requires time so long as that time pays off in terms of flavour or texture. What I do mind are long lists of ingredients and ingredients that have ingredients, such as the pudding mix. The majority of the recipes call for pudding mix. I don’t even know what is in pudding mix.

It shames me to admit, but the first time a friend gave me a bag of Amish Friendship Bread starter it went into the garbage. I don’t believe in wasting food. But that time I did. So in an attempt to not waste this second batch I decided I needed to simplify both the process and the recipe.

After reading over the instructions, it became apparent that the purpose of pampering the starter for ten days is to increase its volume. That is all. The majority of the recipes call for one cup of the starter. This is exactly the amount that was passed on to me. I really only needed to keep the starter for ten days (feeding it on day 5) if I wanted to have left over starter and more to pass on. So I made the decision to use all of the starter in one recipe. I also needed a birthday cake for my dad so things were going to work out well!

I realised there must be other people out there who want a simplified recipe for their Amish Friendship Bread. And after searching a few blogs, I found that there are plenty of people who are making this bread without pudding mix with varying degrees of success. Many of these people also don’t understand what, if anything, the pudding mix adds. So they have done away with it and have replaced it with mashed banana or apple sauce. Much healthier options!

I decided on the very simple recipe below because I had all of the ingredients in my pantry already.

Really Simple Amish Friendship Bread Recipe (Sans Pudding):

1 cup starter

2/3 cup oil

3 eggs

2 cups flour

1 cup sugar

2 teaspoons baking powder

½ teaspoon salt

1 ½ teaspoons cinnamon

2 teaspoons vanilla

Tools you need:

–          2 glass, ceramic or plastic bowls

–          1 wooden or plastic spoon/spatula

–          2 loaf pans

–          Measuring cups (dry and liquid)

–          Measuring spoons

Most recipes advise against using metal tools. Unfortunately, I haven’t found a very scientific explanation. Apparently, metal will inhibit the ability of the yeast to act as a leaven.

Directions:

  1. Combine all of the dry ingredients (flour, sugar, baking powder, salt and cinnamon) in one bowl. If your bowls are two different sizes it is best to use the smaller bowl for this (see why in step 3). I like to sift my dry ingredients together into a bowl because it is pretty humid where I live and this gets rid of any lumps. I used a metal whisk to fluff up my flour before measuring it. This is generally a good idea if, like me, you buy flour in bulk and it is kept in a container. Over time the flour gets packed down and this can skew the accuracy of your measurements. Weighing your dry ingredients will also work if you can find a recipe with weight measurements and you have a food scale.
  2. In the other bowl (the larger one, if they are different sizes) combine the wet ingredients (oil, vanilla, eggs and starter). If you can, try to use liquid measuring cups. I must admit, I did not use a liquid measuring cup to measure the starter. I already had the dry 1 cup measuring cup out so I just used that. I used a metal whisk to mix the eggs and oil. Then I used a wooden spoon to mix the starter and the vanilla into egg and oil mixture.
  3. Gradually add the dry ingredients to the wet ingredients (which are in the larger bowl, thankfully) and use the wooden spoon to stir.
  4. At this point you can add any additional flavours you would like. I chose chocolate chips and chopped pecans simply because I had them in my pantry.
  5. Take a knob of butter and rub it around the inside of both pans and sprinkle in some sugar.
  6. Pour the batter evenly between the two pans.
  7. Bake in an oven at 350 degrees Celsius for 40 to 45 minutes.

Things I liked about the recipe:

  • It doesn’t call for pudding mix and I had all of the ingredients that it does call for in my pantry. Because this recipe omits the pudding, the sweet flavour imparted by the yeast comes through.
  • The recipe is very simple. I used only 1 dry measuring cup (the 1 cup measure), 1 wet measuring cup and one measuring spoon (the ½ teaspoon measure).

Things I didn’t like about the recipe:

  • It calls for a lot of white sugar and white flour. For a birthday cake, this is fine. It is a celebration after all. (I think “bread” is a misnomer. With this much sugar and white flour, it really is a cake.)
  • The cakes did not rise very much (maybe because I used a metal whisk and metal sieve at points during the preparation?). I think that the majority of the leavening came from the baking powder. I’m glad that I didn’t tend to the starter for ten days for this reason.

Improvements to be made:

  • I should probably remember to include the cinnamon next time! It would have added another level to the flavour. Fortunately, the cake tastes fine without it.
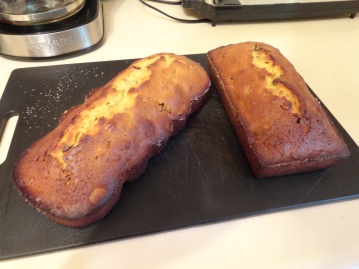
  • I burned the bottoms of the cakes a little bit. I have to remember that my oven is pretty hot. When I bake I often end up taking things out before the recommended bake time. 35 minutes would probably have been adequate. I am fortunate because my dad happens to like things a little burned. At least that is what he has told me my whole life. If you do accidentally burn the bottoms, don’t sweat it! Just cut the burned bottom crust off.

Waldorf Astoria Red Velvet Cake

My great-grandmother was the original hipster: she was making red velvet cake before it was cool.

Though, in all sincerity, it does seem that red velvet cake has suddenly become A Thing. I’d never heard of it before, then suddenly the kids at ACAD are making it, the recipe is showing up in hip Friday newspaper supplements, and my parents claim to have found red velvet cupcakes at a high-end cupcake joint recently (…which about brings me to the limits of my pop-cultural awareness. Still. It seems to be cropping up a lot lately.)

No kidding people want to make red velvet cake: it’s a really beautiful colour, and it has a fancy (and frankly delicious-sounding) name; it’s an old-fashioned recipe, and there’s a real joy in this kind of interactive nostalgia.

My aunt made red velvet cake from this recipe and brought it to a family gathering, and it turns out that my uncle has my Great-Grandma’s original recipe in his possession: typewritten with handwritten comments in pencil. I have reproduced it below.

Apparently there is an urban legend that red velvet cake originated at the Waldorf Astoria hotel in New York, hence the name, but I suspect it has more to do with how posh you sound when you offer ‘Waldorf Astoria Red Velvet Cake’ to your family/friends/lover(s)/neighbours/co-workers. Undoubtedly, my Great-Grandma J was an impressive woman with or without the ‘Waldorf Astoria’.

–x–

‘Waldorf Astoria Red Velvet Cake’

1/2 cup crisco

1 1/2 cups white sugar

2 eggs

1/4 cup red food colouring [my great-grandmother has crossed this out in the original, and hand-written,] Cochenial* [sic] from Drug Store (too strong, use less)

2 tablespoons cocoa

1 teaspoon vanilla

1 teaspoon salt

1 cup buttermilk

2 1/2 cups sifted cake flour

1 tablespoons white vinegar

1 teaspoon baking soda

Cream crisco and sugar until fluffy, add eggs one at a time and beat one minute. Put cocoa and red food colouring in a cup and make a paste and add to above. Add salt. Put vanilla in buttermilk and add slowly to mixture alternating milk and flour. Put vinegar in a cup and add soda, add to mixture. Bake in 2 – 9″ pans at 350 oven, 30 to 40 mins.

Frosting

1 cup milk

5 tbsp. flour

Mix flour and milk to make a smooth paste; cook until thick. Cool.

1 cup butter

1 cup icing sugar (apparently my aunt used granulated sugar and that worked well)

1 tsp. vanilla

Beat with mixer. Add flour mix gradually till all blended.

*This is a misspelling of “cochineal”, a dye made from crushed bugs of the same name. As far as strange ingredients go, this one takes the cake (haha). (I’ll be writing more about this soon.)

–x–

I do not have a photograph of what this cake ought to look like when it’s finished, which, I think, is part of the fun — no glossy, intimidating photographs to frighten me away from giving it a go. Instead, I’ll leave you with a photo of my Great-Grandmother J and my aunts.